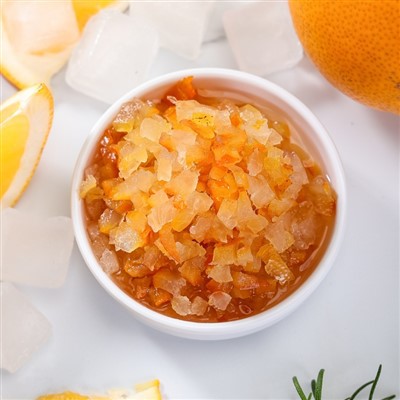
Making lemon peel pancakes is a delightful culinary adventure that combines the tangy freshness of lemon peel with the comforting warmth of pancakes. As a lemon peel supplier, I'm excited to share with you a step-by-step guide on how to create these delicious treats. Not only are lemon peel pancakes a great way to start your day, but they also showcase the versatility of lemon peel in the kitchen.
Ingredients
- 1 1/2 cups all-purpose flour
- 2 tablespoons sugar
- 2 teaspoons baking powder
- 1/2 teaspoon baking soda
- 1/4 teaspoon salt
- 1 cup milk
- 1 large egg
- 2 tablespoons melted butter
- 2 tablespoons grated Dehydrated Lemon Rind or Lemon Dried Peel
- Additional butter for greasing the pan
Step 1: Prepare the Lemon Peel
If you're using Dehydrated Lemon Rind, you can simply grate it using a fine grater. The dehydration process intensifies the flavor of the lemon peel, giving your pancakes a bold citrusy kick. On the other hand, Lemon Dried Peel also works well and adds a more subtle lemon flavor. Make sure to remove any white pith from the peel, as it can be bitter.
Step 2: Mix the Dry Ingredients
In a large bowl, whisk together the all-purpose flour, sugar, baking powder, baking soda, and salt. These dry ingredients form the base of your pancake batter and provide the structure and flavor. The sugar adds a touch of sweetness, while the baking powder and baking soda help the pancakes rise.


Step 3: Combine the Wet Ingredients
In a separate medium bowl, whisk together the milk, egg, melted butter, and grated lemon peel. The milk adds moisture to the batter, while the egg acts as a binder. The melted butter gives the pancakes a rich and buttery flavor. The lemon peel is the star of the show, adding a bright and refreshing citrus flavor.
Step 4: Combine the Dry and Wet Ingredients
Pour the wet ingredients into the bowl with the dry ingredients and stir until just combined. Be careful not to overmix the batter, as this can result in tough pancakes. A few lumps in the batter are okay. The goal is to have a smooth and slightly thick batter.
Step 5: Let the Batter Rest
Let the batter rest for about 5 minutes. This allows the flour to absorb the moisture and the baking powder and baking soda to activate. Resting the batter also helps to develop the flavor of the pancakes.
Step 6: Heat the Pan
While the batter is resting, heat a large non-stick skillet or griddle over medium heat. Add a small amount of butter to the pan and let it melt. The butter will prevent the pancakes from sticking to the pan and add a delicious flavor.
Step 7: Cook the Pancakes
Pour about 1/4 cup of batter onto the hot skillet for each pancake. Spread the batter slightly to form a round shape. Cook the pancakes until bubbles form on the surface, about 2-3 minutes. Then, flip the pancakes over and cook for another 1-2 minutes, or until golden brown on the other side.
Step 8: Serve the Pancakes
Transfer the cooked pancakes to a plate and keep them warm while you cook the remaining batter. You can serve the lemon peel pancakes with your favorite toppings, such as fresh berries, whipped cream, maple syrup, or a dusting of powdered sugar. The tangy lemon flavor of the pancakes pairs well with the sweetness of the toppings.
Tips and Variations
- Adjust the Lemon Peel Amount: Depending on your preference, you can adjust the amount of lemon peel in the batter. If you love a strong lemon flavor, you can add more lemon peel. If you prefer a more subtle flavor, you can reduce the amount.
- Add Other Ingredients: You can customize your lemon peel pancakes by adding other ingredients, such as chocolate chips, nuts, or shredded coconut. These additional ingredients will add extra flavor and texture to the pancakes.
- Make a Large Batch: Lemon peel pancakes are a great make-ahead breakfast. You can make a large batch of batter and store it in the refrigerator for up to 2 days. When you're ready to eat, simply cook the pancakes as directed.
- Freeze the Pancakes: If you have leftover pancakes, you can freeze them for later. Place the pancakes in a freezer-safe bag or container and store them in the freezer for up to 3 months. When you're ready to eat, simply thaw the pancakes in the microwave or oven.
Conclusion
Making lemon peel pancakes is a fun and easy way to enjoy the delicious flavor of lemon peel. Whether you're a seasoned chef or a beginner in the kitchen, these pancakes are sure to be a hit with your family and friends. As a lemon peel supplier, I encourage you to try using our Dehydrated Lemon Rind or Lemon Dried Peel in your next batch of pancakes. If you're interested in purchasing our lemon peel products for your business or personal use, please feel free to contact us for more information and to discuss your procurement needs. We look forward to working with you to bring the vibrant flavor of lemon peel to your kitchen.
References
- "The Joy of Cooking" by Irma S. Rombauer, Marion Rombauer Becker, and Ethan Becker
- "Betty Crocker Cookbook" by Betty Crocker
- "Cooking Light" magazine